Friday, July 29, 2011

Restoration Rally - Four Courners Unit, Albuquerque, NM

Early in June we attended the fourth annual Restoration Rally hosted by the Four Corners Unit. Since we returned home from the rally we have been so busy working on our Airstream, Moonshadow, we've had no time to blog. These long summer days are not long enough to do all we want to do. What follows are photos and memories from our Rally experience.

Ken Johansen put together a great rally for those who desire to learn all about what it takes to restore one of these beauties. The whole thing was held in Albuquerque at the Enchanted Trails RV Park Located on old Route 66 just west of the city. If you like vintage, the owner of this RV Resort Vickie Ashcraft is passionate about anything vintage. It is a fun stay, rally or not.

We had a great time and owe a big thanks to everyone who was part of bringing this event together.

Seminar in progress under the big-top.

Luke Bernander telling his now famous story about his broken axle.

Huevos Rancheros for breakfast.

Inspecting work being done by Steve Bittner on one of Area 63 Productions project trailers.

Uwe Salwender from Area 63 Productions demonstrating how to convert drum brakes to disk brakes.

Kip Eagan, the sheet metal & rivet wizard showing us everything we could possibly want to know, and more.

Levon Register, after a polishing demonsrtation.

Raffle night, Sue wins a 4CU cookbook. We were hoping for the grill but a cookbook is better than nothin'!


Here are a few photos of trailers that were in attendance.

Tuesday, June 28, 2011

Taos, New Mexico - Paintings on Exhibit

Early in June we made a road trip to Taos, NM to deliver paintings for an exhibit at Total Arts Gallery where I (Spike) have been represented for the last ten years or more. The theme of the show was New Mexico landscapes, an exhibit of both oil and watercolor paintings which were completed on location and in the studio. In conjunction with the exhibit reception I promised to do a painting demo for the crowd. Don’t ask me how I got talked into that! 

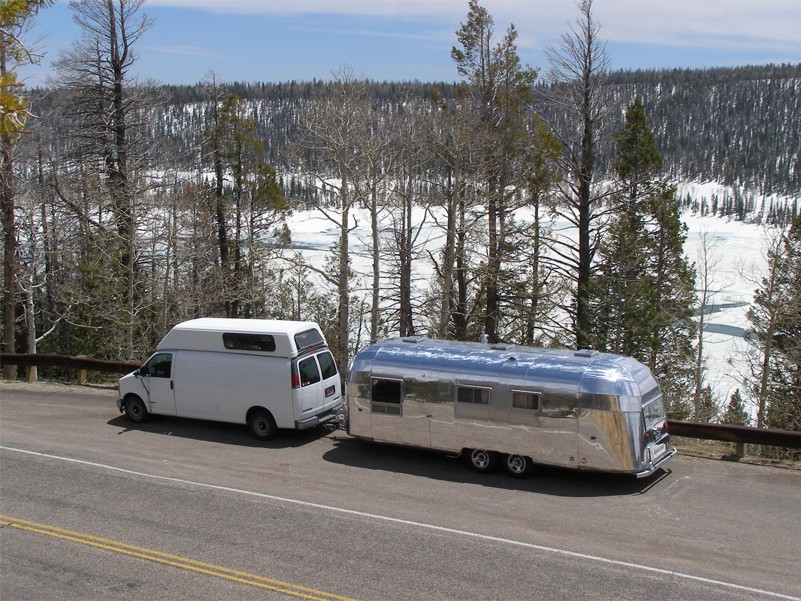
Here are a few shots of “Moonshadow” being towed by my mobil studio. Photos taken along the way between our home base in southern Utah and Taos in northern New Mexico.


Not far from home at 10,000 feet altitude US hwy 14 East of Cedar City, UT.


A few hours later we went from cold and snow to the hot and dry Arizona desert.


The next day we arrived in Taos to find the horses just as friendly as the people.


Below are a few of the paintings featured in my Taos exhibit. If you wish to see the entire exhibit, click to start the slide show at the bottom. A short video of the demo I did in Taos is located just below the slide show near the bottom of this post.

My Blue Gate, oil 12x16'' sold

Sunshine and Snow, watercolor 30x40''

Beautiful Morning, oil 12x12'' sold

Looming Storm, watercolor 15x22''


Public demonstration at Total Arts Gallery, June, 2011.

Sunday, May 29, 2011

Hehr Window Restoration: Rear Emergency Exit, Storage Door and More

Everyone who has rebuilt Hehr windows from the 50’s knows the work involved in replacing the famous back-frame gaskets. Let me just say, yes there are a lot of parts to clean, put back together with a new gasket, then re-rivet to the trailer.  But come on folks, they are handmade pieces of history! Real craftsmanship from a time when what a person made with their hands meant something. In other words, true vintage, and I think they are great.

The rear window in our trailer is an emergency exit window. This window has an extra frame mounted permanently in the shell of the trailer which the Hehr window is then mounted into with a hinge at the top. There are two lock down latches at the bottom inside which when released allows the entire window to swing out for exiting in an emergency.


Here you can see the rear window with the drip-edge pulled up exposing the hinge at the top, which allows the entire window to open in case of an emergency.


After removing the entire window back frame and all, I also removed the storage compartment door and old hinge system.


Fifty-six years of a steel latch clip riveted to the aluminum rear window frame caused severe corrosion due to chemical reactions between the two metals. The corrosion was so bad I decided to remove the clip and clean it all up.


To my surprise they cleaned up much better than I thought they would. Before re-riveting the clip back to the window frame I wrapped it with two layers of electrical tape to prevent contact of the two metals with the hope that it will last another fifty-six years or more.


The rear window has two vertical mullions, one which holds the crank that opens it and one which holds the latch that locks it down. These vertical mullions are also steel riveted to aluminum which again results in corrosion. Before putting it back together I used a piece of folded plactic, seen here, and attatched it to the backside of the mullion using aluminum foil tape. I would have used electrical tape here but it could be seen from the outside.


The gasket that has to be glued to the back of the frame before reinstalling must be held firmly in place while the glue sets up. I made a couple of small wooden corners to use whenever adhereing these gaskets to hold them against the window frame. The adhesive I used was TremPro 644 RTV silicone.


I used aluminum foil tape to seal the seams on the inside edges of all corners, then put a nice bead of the 644 silicone on the opposite side of the foil (outside edges) as extra insurance against moisture getting past the gasket.


After putting everything back together I changed from normal window screen to a special sun-shade screen which helps keep the rear bedroom area cooler in the summer. This screen's over all gray color looks good too.


Now I turned my attention to the rear storage door and hinge. The rear storage door on our trailer is also made by Hehr, or at least the hinge for it was. The hinges on the 50’s Hehr windows have a nice hook-over and loop-into sheet metal hinge system which works very well. This design is still used today by most RV and camper shell window makers. (Of course they are all extruded aluminum or plastic and not re-buildable in today’s throwaway world.)  However when this hinge design is turned upside down, as it is on my rear storage door, see photo above,  it acts as a catch-all for everything you don’t want it to catch, like water, snow and dirt. All of these things only serve to make the hinge work less correctly over time and our trailer has 56 years of time, so I was determined to change this upside down hinge to a better aluminum piano hinge. The following photos show what I did to correct the problem. 
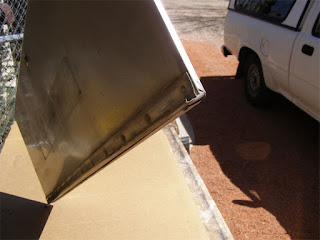
 Here you can see the hooked sheet metal on the bottom of the door which is part of the Hehr hinge and the catcher of rain, snow and dirt. 


Normally this part of the door hinge would not be removed, simply cleaned and polished along with the door but I wanted to replace it.


Here is the four inch piano hinge I bought from Fastenal, a company I never heard of until reading a post by Doug Bakken who publishes a blog named, Just Streamin' 54 Cruiser "Nellie" where he wrote about aluminum piano hinges from Fastenal. Just what I was looking for!  I went on-line to learn there is a Fastenal store 20 miles from me, in Cedar City, Utah.


Now the trick was to bend the hinge into the configuration needed so the storage door would properly seal against the gasket. After I cleaned the door and put it back together, I held it firmly in place and made a wire template of the bends needed for the hinge.


The next best thing to owning your own sheet metal break is having an ol' friend who has one. Friend, Tom Harris, matched the wire template exactly. Here he holds the results.


With the door cleaned and polished and hinge attached with Olympic rivets and TremPro 636 (previously Vulkem) it was ready to be put back in place.


I love it when a plan comes together. Old Hehr upside down hinge out, new Spike-styled hinge in!


Now on to a few other things....My 40-something son, Paul,  who doesn't mind working his tail off came up a couple of weekends from Las Vegas to help his ol' man do some polishing.  He's more than willing to find time to help me fix up the old Moonshadow. It probably has something to do with the fact that I've told him, if he doesn't want to inherit it, I'm going to be buried in it.


Paul thought it was easier to work on the top of the trailer from the vent holes rather than climbing around the outside on a ladder. So I said go for it!


With the drip-edge reinstalled over the rear window and storage door, along with more polishing the rear end is looking better.


Most of the first step of polishing  is completed.  We are about ready to head for the Four Corners Unit Restoration Rally in Albuquerque where we'll learn what to do next. 


Tuesday, April 26, 2011

Art & Books - Artist Books

On exhibit in Santa Fe

Sue currently has work on exhibit at Vivo Contemporary Gallery in Santa Fe, New Mexico. She is one of eleven book artists participating it a “book art eVent” April 22 to May 10, 2011. Vivo Contemporary is an exciting new gallery located at 725 Canyon Road in Santa Fe. Along with the eclectic mix of Santa Fe artists represented, they include an innovative Book Arts Gallery within the gallery, “a hands-on showcase of book arts in an inviting atmosphere.”

Vivo's “book art eVent” is a regional invitational exhibit featuring artists from California, Colorado, Utah, Arizona and New Mexico. For those not familiar with the term “book art” here is an explanation from Vivo Contemporary Gallery's own website:

Contemporary book art integrates media such as printmaking, drawing, painting, photography, computer graphics, typography, story telling, calligraphy, writing and poetry. Artist books explore innovative connections between content, structure and technique. The resulting art is unique in its ability to create two and three-dimensional formats simultaneously.
Pictured below are Sue's three pieces at Vivo Gallery with explanations of each. To see more, visit her website (see link on right listed under "Our Web Sites".)

Un Amor de Mexico
altered book


An “altered book” is an ordinary, usually worn out old book which an artist has altered in various ways to transform it into a work of art. Quite often altered books become free-standing (or hanging) sculptural pieces.

The book I used for “Un Amor de Mexico” was purchased at a library book sale in San Miguel de Allende, Mexico. Its original title, Un Amor, suggested to me the theme. I wanted it to represent my love of Mexico and Mexican culture, to be a container of fond memories.

The bird figure is an Inca dove, common in Mexico. She's made of sculpted Mexican bark paper, embellished with glass beads and jacaranda pods. The inside pages were transformed  into a small niche containing bits and pieces I collected along the way, each representing unique experiences.

Where from, whither bound?
rock-book


I have made many books using split rocks for the covers. I find these rocks while on walks in  desert arroyos or along mountain streams. For this book I made special sheets of paper formed in the shape of the rock. The pages are assembled in a concertina fold that opens out to reveal cutout sections of a world map. Most of the map sections show a location I have traveled to, with the exception of the star maps, of course, not yet anyway. When closed this book is secured with a cotton strap and length of chain.


A Bird Feeder's Year
rock-book


Sometimes the shape of a rock gives me an idea of what kind of book it should be. In this case, the rock reminded me of a bird's wing, so I turned it into a book about the birds who visit my feeders through the seasons. Since most are little brown birds, I decided to make the book in the form of a white-crowned sparrow, one of the most attractive sparrows, as sparrows go.


Slide show Inside pages of "A Bird Feeder's Year"


Saturday, April 9, 2011

Airstream Restoration: Axles first, Spring of 2010


Canyon de Chelly  -  oil 16x20''

Sue and I had been thinking of getting our Airstream back on the road for some time.  The old 6 volt brakes that came with the trailer served us well for many years with a voltage resister on the break controller, but the time had come to replace them. The easiest way seemed to be to replace the entire axel with new, modern brakes.  The next question was, where do we find new axles for a 55 year old trailer? At this point we had no idea.

In May of 2010 I was in Canyon de Chelly, AZ on a painting trip, car camping in my mobile studio. I pulled into the campground near the canyon entrance to discover some 90 Airstreams taking up most of the park. It was a WBCCI (Wally Byan Caravan Club International) caravan touring the South West.

WBCCI Caravan in Canyon de Chelly, May 2010

Being a proud Airstream owner I just had to talk to someone in the group. A man named Jerry Hall from North Carolina was very helpful and gave me good information about what’s going on in Airstream circles these days. He informed me Airstream now uses Dexter Axles and directed me to a source. When I returned home I got on-line, joined the WBCCI and then VAC (Vintage Airstream Club). Through the VAC on-line forum I found someone with a trailer close to the same year as mine, Bill Kerfoot from California who owns a 1954 Airstream double-door Liner. Bill confirmed what I had concluded, that replacing the old axles with new axles and brakes was indeed the best way to go. 


Within two weeks we ordered new Dexter axles, they were delivered early in July. We began figuring out how to remove the old and install the new. To my surprise we discovered that at some point before I owned this trailer serious damage had been done to the center axle hanger that supports the equalizing arm on the curb side. I remember Roy telling me about damage to the right side of the trailer that required a trip to the Ohio Airstream factory for repair. I wish I had paid more attention now. The photo below left, shows how off-center it was. It must have broken loose and was welded back in a misaligned position, almost a half an inch off. I always had bad wear on the right rear tire and now I understood why.  


The center hangers that came with the new axles were shorter than those originally mounted to the trailer frame. I wanted to use the old hangers so the trailer would not ride any lower than it already was so my solution was to cut the misaligned hanger off at a point that would allow me to weld the new shorter hanger to it, thus maintaining the same height (photo above right).

With the center hangers measurement from the hitch, now the same on each side, 
I used a jig to ensure correct alignment of the front and rear hangers.

 
We loosened the belly skin in order to reach in
and shroud insulation from welding sparks.

With help from my oldest son Paul and a fellow Airstream owner Steve Masefield we got the new axels mounted and a brake controller installed in the tow van which is my mobile studio, (more about the mobile studio in another post.)

Steve Masefield (left) helping with the brake controler. 

Finally ready to roll.

By now it’s the beginning of August and we wanted to be in Salida, Colorado by the 8th to attend the Rocky Mountain Vintage Rally hosted by a club in Denver. We had Moonshadow roadworthy only hours before our departure deadline.

First 500 miles on new axles, arrived safely at rally site.


Patti Reed's 1953 Flying Cloud
  
Shari & Rod Davis' 1956 Safari / 2010 award winning restoration.

Herb Spies' 1963 Globe Trotter, WOW, what a polish job!

 
Our rally neighbors, Duane & Cheryl Ferguson with dog Buddy
& their 1976 Caravaner

We had a fabulous time, met some great people, learned a lot and even got a polishing demo by Rob Davis done on our own Moonshadow. Watch this video, it’s almost as though, after 55 years, we get a peek into the hidden soul of our trailer.


Our Airstream is still usable even though it needs a full restoration from the frame up. It is in original condition. As the guys on the VAP (Vintage Airstream Podcast) say, trailers like ours are survivors. Our plan is to do the outside cosmetic work and window restoration first while we enjoy a few more trips. We’ll then dive into it deep and serious towards the end of this year.

Rocky Mountain Vintage Rally 2010
That's us at 9:00 in the innermost circle.